Help · Simulator
How to use the eclipse simulator
A quick guide to getting the most out of the simulator: choosing your exact point, understanding the verdict and score, reading the real horizon and following the timeline minute by minute.
In three steps
- Search your location by name, tap the map or enter coordinates — the simulator instantly computes visibility from that exact point.
- Check the verdict (visible, marginal or hidden) and the 0-100 score to know whether it's worth setting up your tripod there.
- Slide through the timeline to see, contact by contact, where the Sun will be relative to the real horizon — and switch on Plan B if clouds threaten.
Choose your point: search, map or coordinates
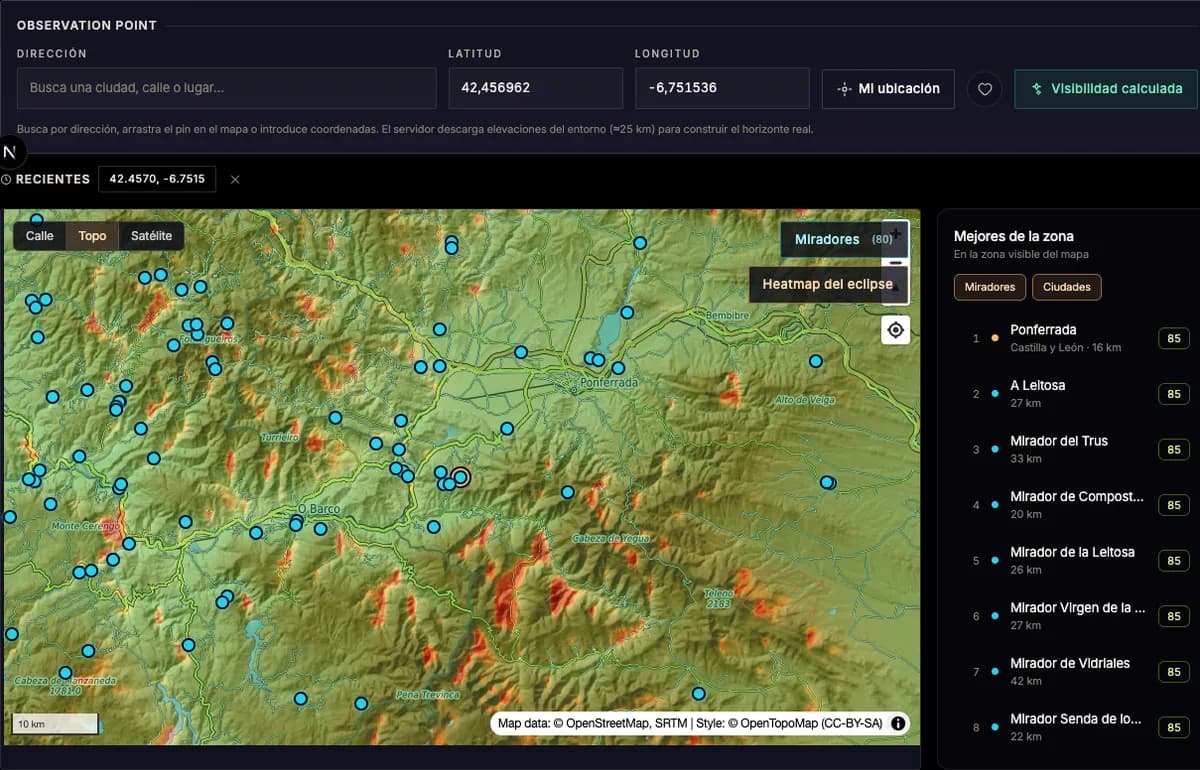
You can reach your location three ways: typing the name of a city or viewpoint in the search box, tapping directly on the map, or entering latitude and longitude if you already have an exact spot in mind.
The map shows an obscuration heatmap: a gradient that places you, at a glance, inside or outside the path of totality, and how far you are from the central line. Over that layer sit the curated viewpoints — spots we've reviewed one by one for their clear horizon, access and capacity — so you don't have to guess where it's worth going.
Changing your point recomputes everything instantly: verdict, score, horizon and timeline update without reloading the page.
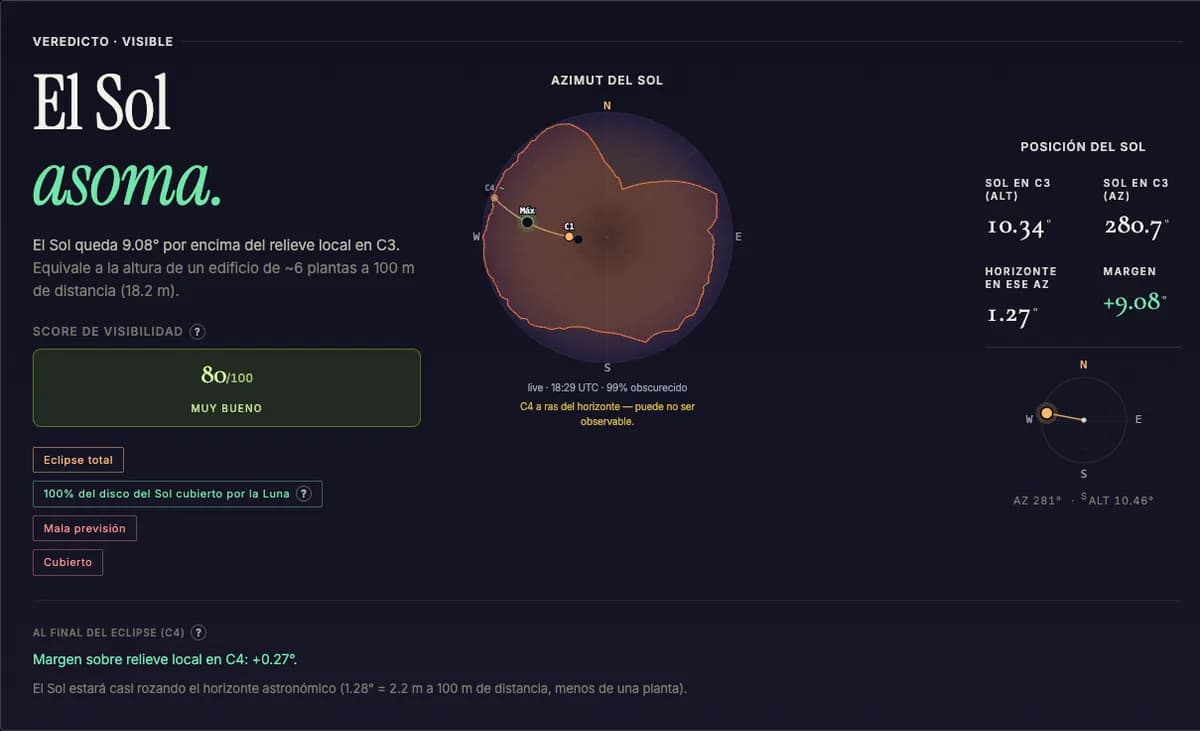
The verdict and the score: is it worth going?
The verdict sums up in one word whether you'll see the eclipse from that point: visible when the Sun stays clearly above the real horizon during the phase you're checking, marginal when the margin is narrow and depends on terrain or atmospheric details, and hidden when something — a mountain, a building, the very curvature of the horizon — gets in the way.
The 0-100 score goes beyond yes or no: it combines the eclipse type (total or partial), the margin above the real terrain, the duration of the phase and the cloud climatology for that date and place. Two locations with the same visible verdict can have very different scores if one has much more horizon margin or a historically clearer sky.
The trickiest point is usually the last contact (C4, end of the partial eclipse): the Sun is lower there, so the margin above the real horizon narrows — and that's where mediocre terrain makes the difference between seeing the end of the event or missing it.
The horizon and the Sun's position
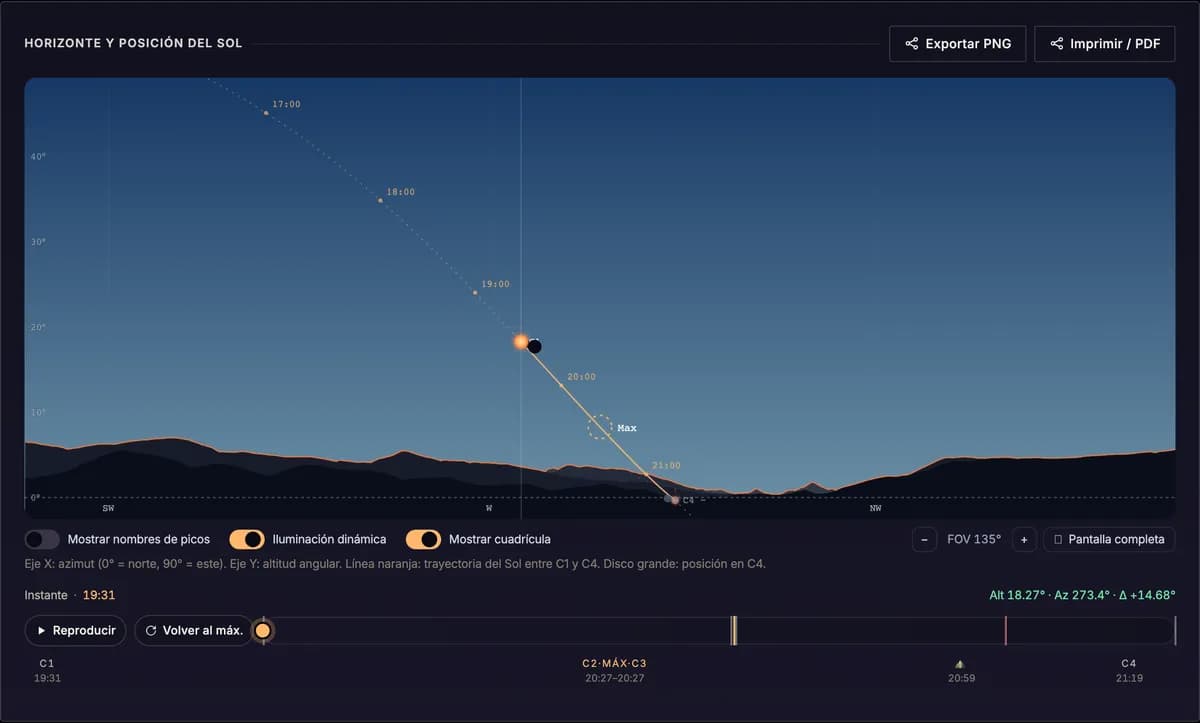
This is the centerpiece of the simulator: a panoramic silhouette of the real terrain around you, not a generic flat horizon. It's drawn with depth bands so you can tell a nearby hill from a distant mountain range, and over it the Sun's full path across the day is traced, with local times marked.
You can zoom and drag to explore the sky with a field of view adjustable between 40° and 135° — from a wide-angle framing to something closer to what a telephoto lens would see — and switch to fullscreen for an immersive view.
During the totality window, the simulator also flags which planets and bright stars will be visible to the naked eye: the sky darkens enough for a minute or two that Venus, Jupiter and the brightest stars appear next to the eclipsed Sun.
Timeline and time control
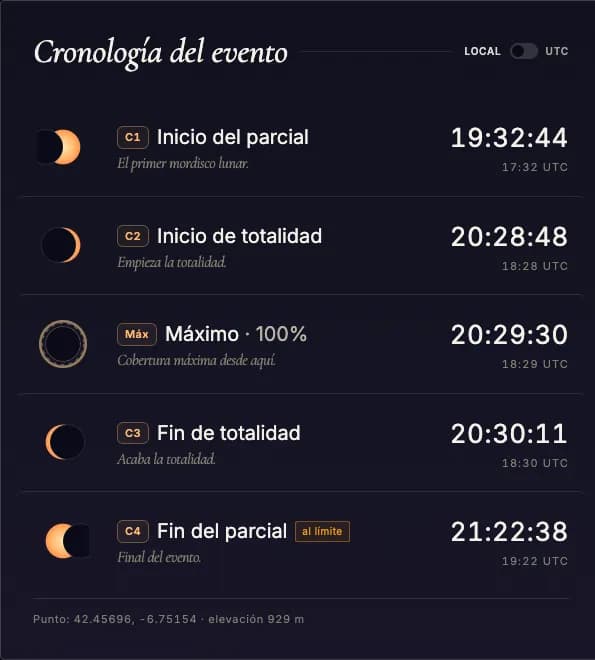
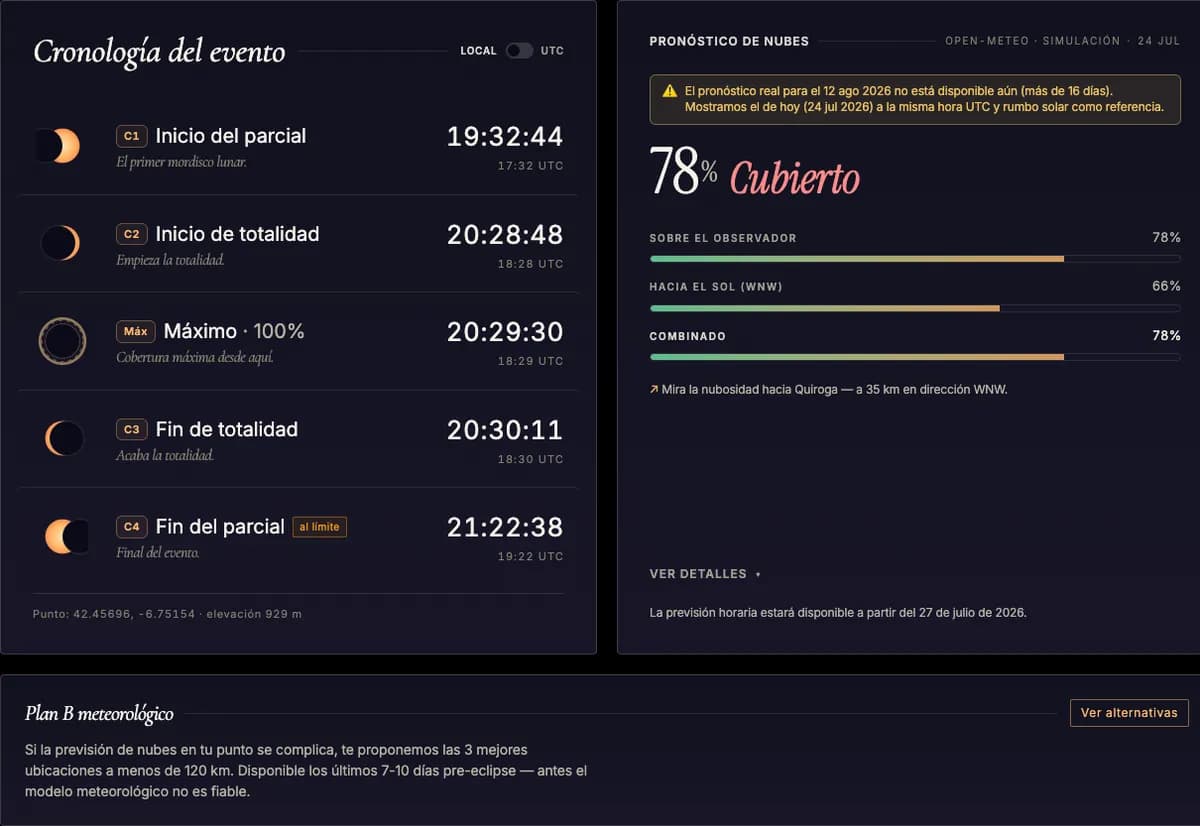
The eclipse has four key moments — the C1 to C4 contacts — from when the Moon first touches the solar disc (C1) to when it fully leaves it (C4), passing through the start and end of totality (C2 and C3) if you're inside the path.
The timeline slider lets you move freely between those contacts and see, for each instant, the Sun's position above the real horizon. The playback button animates the whole sequence at an adjustable speed, so you can mentally rehearse the entire event before the big day.
Clouds and Plan B
What actually matters isn't how much cloud is above you, but whether a cloud crosses the line between you and the Sun — which sits very low, just a few degrees above the horizon, during the eclipse. That's why the simulator follows that line of sight: close to the date, with a real weather forecast; further out than about two weeks, with historical climatology (the odds of a clear sky on that date and place, based on past years) to give you a reasonable estimate even before an exact forecast exists.
If the forecast cloud cover is high, the simulator suggests nearby alternatives — the so-called Plan B — spots a short distance away with better historical climatology or a more favorable forecast, so you don't have to depend on a single location.
How we compute this
We start from a global-resolution digital elevation model of the terrain (~30 m, Copernicus), over which we trace hundreds of rays around each observation point, scanning the terrain out to several tens of kilometers and measuring the real horizon angle in every direction. That calculation accounts for Earth's curvature and atmospheric refraction, which make distant objects appear a little higher than flat geometry would suggest.
The Sun and Moon positions are computed with precision ephemerides — the same algorithms (Meeus) used by much of professional positional astronomy, via the astronomy-engine library — and converted to topocentric coordinates: the real view from your exact point, not from the center of the Earth.
The verdict compares the Sun's altitude at each contact against that real horizon. The score adds the eclipse type, the margin above the terrain, the duration of the phase and a cloud estimate based on historical climatology (ERA5) and, where it applies, AEMET data. On top of that, for each contact we separately check whether the cloud forecast crosses your line of sight to the Sun — what actually decides whether you'll see it, not the cloud right above you — using a real weather forecast once the date gets close.
Frequently asked questions
- Do I need to be exactly inside the path of totality to use the simulator?
- No. The simulator works anywhere in Spain, inside or outside the path of totality: for a partial eclipse it still computes the verdict, the score and the full timeline.
- Why does the score change if I move the point just a few kilometers?
- Because the real horizon changes with the terrain: a nearby hill, valley or building can change the margin above the terrain at the critical contact (C4), even though the Sun's astronomical position barely changes over that distance.
- Does the simulator account for the weather on that day?
- Yes. Close to the date we use a real weather forecast to check whether a cloud crosses your line of sight to the Sun — the thing that actually matters, not just how much cloud is overhead; when the date is still far off, we fall back on historical cloud climatology.
- Can I see the position of other objects besides the Sun?
- Yes — during the totality window the simulator flags which planets and bright stars should be visible to the naked eye from your point.